Description
Comes complete with batteries.
Can also be manually operated.
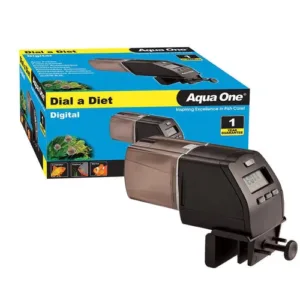
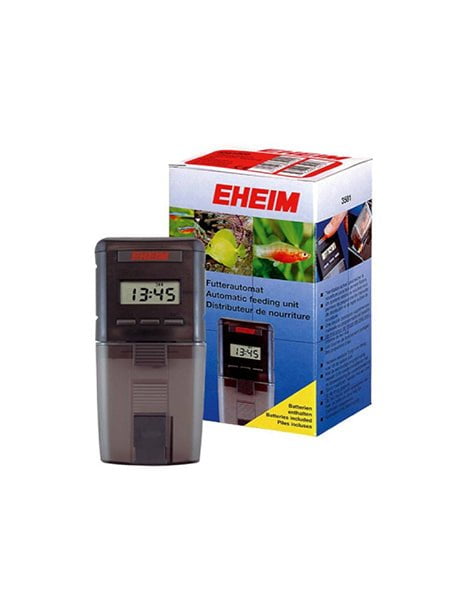
Our favorite auto-feeder because it’s so straightforward and easy to use. Program up to 4 daily feeding cycles of flake food or granules, choosing between single portion, double portion with 1-minute interval, or manual override. All your programmed choices are presented on an easy-read LCD screen. Features a transparent reservoir for “at-a-glance” monitoring of food level and integrated ventilator to prevent moisture from spoiling food or clogging the unit. Two AA batteries included; low battery indicator on cover. Feeding drum volume of 100ml (3.3 fl oz) holds approximately 6 weeks of food. Measures 5-1/4? x 2-1/4? x 2-1/2?.
Installation Instructions & Setup
To insert the batteries (2 x AA size 1.5V alkaline batteries), open the Housing Cover by applying light pressure on the Locking Clip. Pay attentions to the proper polarity of the batteries. Note: DO NOT use rechargeable batteries.
Closing the Housing Cover
Insert the upper edge of the Drive Unit and pivot downwards until the lock engages.
Changing Batteries
If the symbol “LO” appears on the Display, it means that the batteries are almost empty. The feeding procedure will still be carried out, but the batteries should be replaced. After about three days, the entire Display will blink and the device will shut off automatically in order to prevent the Feed Container from stopping in a downward position.
Programming
The “Feed Mode” offers 3 options, which are shown in the upper line of the Display, to the right of the Feed Digits (1-4).
No Arrow = The Time is stored but no feeding occurs.
1 Arrow = The Feed Container rotates once.
2 Arrows = The Feed Container rotates twice with a 1 minute interval. This extends the time interval for feeding without engaging additional feeding times.
General Programming Rules:
MODE switches initially between the current time and the feeding times (1 to 4 consecutively). The current time is displayed whenever you see the blinking arrows. The feeding times are differentiated by digits (1-4) appearing on the upper section of the Display.
SET allows the displayed times to be changed. With MODE, the displayed time can be changed between Hours and Minutes, as well as the Feeding Mode. The Time and Feeding Mode can be set to a higher number with the “+” Button.
SET stores the programmed time and scrolls to the next feeding time to be programmed.
Example: After the batteries have been inserted, the Time begins at “00:00” and the Arrows will blink at one second intervals.
Setting the Current Time:
Press SET > “Hours” will blink and the desired number can be entered with the “+” Button.
Then press MODE > “Minutes” will blink and the desired number can be entered with the “+” Button.
Finally, press SET > Current time has now been entered.
Programming Feeding Time 1:
Press MODE > Feeding Time 1 is displayed as “00:00” with the digit “1” on the upper section of the LCD.
Then press SET > “Hours” will blink and the desired number can be entered with the “+” Button.
Then press MODE > “Minutes” will blink and the desired number can be entered with the “+” Button.
Then press MODE again > The Digit “1” will blink. Press the “+” Button once for a single ration and press the “+” Button twice for a double ration.
Finally, press SET > Feeding Time 1 has now been entered. The next feeding time will be displayed and it can be programmed in the same manner.
Manual Operation
For feeding outside the programmed times, press the “EHEIM” Manual Feeding Button to manually trigger the rotation of the Food Container.
Filling
Take out the Food Container and remove the cover on the back. Clean the Drum, making sure it is dry before filling it with food. Place the cover back on and insert the Drum unit onto the Axis. The Automatic Feeder is recommended for dry fish foods such as flake food and granules. DO NOT use for live or freeze dried foods.
Feeding Amount
Adjust the Sliding Cover on the Food Container to control the amount of food dispensed. For larger amounts, program the Feeder for double portion.
Positioning
Place the Automatic Feeder so the food can fall freely into the aquarium. Be sure not to cover the air-intake opening.

 Purchase this item and get